Category Archives: Baking

Grapefruit & Ginger Cake

Standard

The Sunday just gone marked our second attending at Leicester’s excellent Clandestine Cake Club, this time at Deli Flavour in the recently refurbished Silver Arcade. The theme this month was “Memory Lane”, though I must shamefully admit that the caked I baked has no link to memories whatsoever. I just fancied baking a grapefruit cake, so I err…did.

Before I divulge the recipe, I would like to draw attention to the fact that on 3rd May I shall be cycling 100 miles to raise money for Alzheimer’s Research and YoungMinds. Please follow this link if you would like to donate, which would make me and my little legs very happy indeed! In some crazy twist of fate I also believe this is our 100th post. Huzzah!

Ingredients

Cake

1 grapefruit
250g sugar
225g stork/butter/spread
3 eggs
300g self raising flour
1 tsp baking powder
1 tsp cinnamon
1 tsp ground ginger

Icing

50g stork/butter/spread
200g cream cheese
300g icing sugar
zest of a lemon
2 stem ginger balls, finely sliced

Method

Boil the grapefruit in a pan for 20 minutes, drain the water, then repeat. (I must admit I don’t entirely understand the change of water but the recipe told me to so I did!). Leave the grapefruit to cool before removing pips and blending to a pulp (the whole thing, including skin).

Preheat the oven to 18ºC/350ºF/gas mark 4Beat the stork and sugar together. Beat in the eggs one at a time, followed by the pulp. Fold in the flour, baking powder, cinnamon and ground ginger. Divide the mix between two well greased/lined 20cm cake tins. Bake for 20-25 minutes until golden brown. Leave in the tins for a few minutes before turning out onto a cooling rack.

To make the icing, beat the butter and half the icing sugar together. Add the cream cheese, remaining icing sugar, zest and sliced stem ginger and beat until smooth. Keep in the fridge until the cake has cooled enough to ice it. Spread half the icing on each sponge, starting in the centre and spreading it outwards in ever increasing circles. For the bottom layer leave a 1-2cm gap around the edge so that when you place the upper layer on top the icing doesn’t splurge out. Place one on top of the other, decorate with a few strips of lemon zest. Share with friends at your local cake club!

J

DSC_0771

Red Onion & Rosemary Bread

Standard

Image


I couldn’t decide what kind of bread to make so just made up a basic bread dough while I mulled it over in my mind palace and came up with this bread bad boy. Boom.

Ingredients

400g strong white bread flour
7g instant yeast
7g salt
250ml lukewarm water
1 large red onion
1 garlic clove
small handful of rosemary sprigs
2 tbsp olive oil
2 tbsp balsamic vinegar
1 tsp soft brown sugar

Method

Begin by making the simple bread dough. In a large bowl, weigh out the flour, salt and yeast – remembering to keep the salt and yeast on opposite sides. Mix in half the water with your hands, add the rest in smaller amounts until you get a soft, workable consistency.

Tip out onto a lightly oiled surface and knead for 5-10 minutes until elastic and smooth. Place in a large oiled bowl then place the bowl inside a plastic bag and leave to rise in a warm place for 1-3 hours or until the dough has doubled in size.

Meanwhile, slice the red onion into your preferred shape (I went for small, thin slices) and gently fry in 1 tbsp olive oil, with a crushed garlic clove and finely chopped rosemary for about 5 minutes, until softened. Throw in the balsamic vinegar and sugar and fry for a further minute.

When the bread has proved, tip out onto a lightly oiled surface and gently knead in the onion mixture. You might need a little more bread flour to offset the extra moisture. When the onion is evenly distributed, roughly shape into a rectangle and place in a deep, rectangular tray. Place the tray in a plastic bag and leave to prove once again in a warm place for around an hour.

Brush with about 1 tbsp olive oil before baking at 180-200°C/360-390°F/gas mark 4-6 for around 20-25 minutes until brown and hollow-sounding when tapped.

Enjoy with cheese, chutney or dipped in oil and balsamic vinegar. Scoffscoffscoff.

Tiramisu Cake

Standard

So George’s sister introduced us to our local Clandestine Cake Club. Each month they hold themed cake making/scoffing extravaganzas based on three simple principles:

1. You make a cake big enough to share
2. You get together and eat and share your cakes (and attempt conversations between mouthfuls of yumminess)
3. You take all sorts of cake home and get fat for the next week

This month’s theme was cakes based on other puddings or in other words, puddings masquerading as cakes. There’s no judging or egotism, just friendly people filling their faces as bemused members of then general public mosey on by. This tiramisu cake is based on the Smitten Kitchen tiramisu cake recipe, whose marsala cream is to die for. In fact, even if you don’t make the cake just make the cream and let spoon meet mouth.

Ingredients

For the coffee cake:

150g butter
120g sugar
150g self raising flour
3 eggs
1 tbsp baking powder
3 tbsp coffee essence such as camp coffee or very strong instant coffee

For the chocolate cake:

130g plain flour
40g cocoa
1 tsp baking powder
100g butter
2 eggs
120g sugar
120ml buttermilk (made simply by adding a tablespoon of lemon juice to milk and leaving for 10-15 minutes)
pinch salt
1 tsp vanilla essence

For the coffee syrup:

3 tbsp coffee essence (as above)
1 tbsp water
1 tbsp icing sugar

For the marsala cream:

250g marscapone
50g icing sugar
200ml double cream
1 tsp vanilla essence
2 tbsp marsala wine

Method

Preheat the oven to 160oC/320oF/gas mark 3  as you prepare the cakes and grease two 23cm (or thereabouts) cake tins.

For each of the two types of cakes, mix the dry ingredients together in separate bowls (sieved flour, baking powder, salt, sugar, cocoa). Add the butter and mix with an electric whisk until each turns to a sandy consistency. Add the respective flavourings.

In a separate bowl or mug, gently beat the eggs for one cake and add to the mixture a bit at a time, whisking until incorporated. Repeat with the eggs for the other cake. The coffee cake mixture is now ready to be poured into the cake tin and baked for 20-30 minutes. To the chocolate cake mixture, add the buttermilk and continue whisking until it becomes smooth. Pour into the second tin and bake for 20-30 minutes.

When baked, take the cakes out of the oven and mix up the coffee syrup in a small bowl. Drizzle evenly over the cakes and leave the cakes to cool fully.

To make the marsala cream, (which by the way, is extremely versatile and I challenge you not to eat any before it sees your cake) begin by beating the marscapone with the sieved icing sugar. In a second bowl, whisk the double cream until it forms stiff peaks. Add around a quarter of the cream to the marscapone mixture and mix thoroughly. Add the rest of the cream to the marscapone and fold very gently, so as not to lose the air from the mixture. When evenly mixed, store in the fridge until you’re ready to assemble your cake…if you can manage to not eat it all first.

To assemble the cake, place the chocolate cake on a plate or tray (the chocolate cake is slightly more structurally sound thus it makes sense for it to go on the bottom). Cover with a thick layer of marsala cream. Place the coffee cake on top. Spread the remaining marsala cream over the top. Dust with cocoa powder in some kind of pretty pattern. And go and join your local CCC!

Tadaaah!

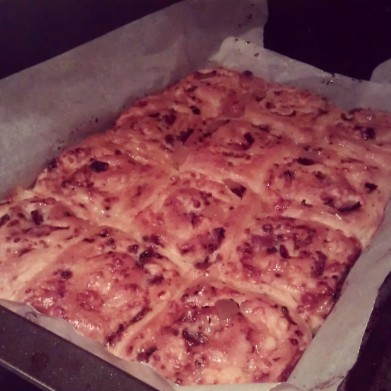
Cheese, Onion and Mustard Swirls

Standard

We love swirls. Sweet or savoury, they are an easy way to make eye-catching office munchies or a traybake to share at a party. These swirls are a take on a recipe from the Smitten Kitchen cookbook, which we handily ‘borrowed’ from G’s sister on an extended (never-ending) loan. Oh well. More time to bake all of the deliciousness.

IMG_20131014_201239

Makes 24 perfect for sharing or 12 as more of a substantial lunch.

Ingredients

375g plain flour
1 tsp salt
black pepper
1 tbsp sugar
7g dried fast-action yeast
150 ml milk
80 ml water
55g butter, melted, plus a bit extra
1 medium onion
170g cheddar
1 tbsp wholegrain mustard
salt and pepper
1 tbsp onion chutney

Method

Begin by making up the dough. Sift the flour into a large mixing bowl, add the salt to one side of the bowl and yeast to the other. Throw in the sugar and pepper wherever you fancy. Pour in the melted butter, add the milk and mix well, then continue to add the water more slowly until you reach a slightly sticky-consistency dough. Throw out onto a lightly floured surface and knead for around ten minutes.

Leave to prove in an oiled bowl until doubled. Meanwhile if you fancy, you can begin grating the cheese and the onion into a bowl.

When the dough has proved, tip out onto a well-floured surface and roll out to approximately 48 cm x 30 cm if you want many to share, or 36 cm x 30 cm if you want them more for a substantial snack. Brush on a little melted butter to help everything stick before spreading on the mustard. Season well. Sprinkle on the cheese and onion evenly before rolling towards you, along the 48 cm or 36 cm edge, to make a tight roll.

Cut the roll into 24 x 2 cm slices if making them to share or 12 x 2.5 cm swirls if making them for lunch. Line one or two deep baking trays with baking paper (depending on how many you’re making). Fit 12 swirls snugly into the tray – obviously if making 24 smaller swirls, you will need two trays. Leave to prove for around an hour in a warm place until the swirls are merging into each other.

Bake for 20-25 minutes at 170*C until golden brown. Whilst they are still hot, mix the chutney with the water in a small glass or bowl. Brush the tops of the swirls with the glaze to give a wonderful sticky shine that makes them look irresistible.

Yum.

Spanakopita (Greek Feta and Spinach Spiral Pasties)

Standard

More flipping swirly things! (Sorry)

Sadly, I haven’t ever managed to capture a shot of these little things. Once they come out of the oven, they are so elusive, you’ll be lucky if you can catch one for lunch the day afterwards. Inspired by a number of recipes, I have amalgamated the ‘best bits’ of each into this tasty concoction.

Ingredients

6 sheets of filo pastry (no, I don’t make my own – maybe one day I’ll give it a go)
1 bag of spinach (approx 500g)
200g block of feta
1 medium white onion
1 tsp garlic paste or 2 cloves of garlic, chopped finely
handful rosemary (fresh, chopped), or 2 tsp dried
1 tsp dried basil
1 tsp dried oregano
1 medium egg
a sprinkling of plain flour
a little bit of milk

Method

Start by chopping up your spinach quite finely. Squeeze out as much of the water as you can from it, over a sieve to catch any bits you drop. This will seem tiresome, but it really is worth it. Grate the onion and similarly, squeeze the water out of that. Add the squeezed spinach and onion to a bowl. Crumble over the feta, herbs and mix well before adding 1/2 of the egg to bind it all together. Save the last bit of egg for later.

Open out your filo sheets onto a well-floured surface. Begin by brushing egg round the outside of the first sheet. Add 1/6 of your spinachy mixture in a long line along the longest edge of the filo sheet, leaving 1 inch around the edge clear (which should be covered in egg). Fold over the filo 1 inch lengthways and widthways, to fully cover the line of spinach and begin rolling the pastry to form a long sausage. Try not to catch any big bubbles of air.

When you have a spinachy sausage, brush one side of it with egg and use this as the glue to hold your spiral together. Roll the sausage around one end fairly tightly and use a bit of egg to glue down the last centimetre. You should have something that looks like this.

Brush the outside with egg and place on a greased tray. Repeat for the remaining 5 sheets of filo.

Bake in the oven at 160*C for around 20-25 minutes until golden brown and crispy.

Take a photo before they all get nommed.

Chocolate Biscotti

Standard

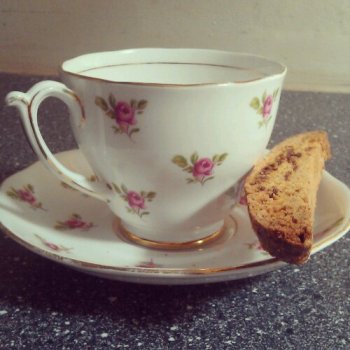
wpid-IMG_20130808_133717.jpg

These make a great biscuit to dunk in tea. Once baked, they will keep for up to a week but they also freeze well if you choose to save some for another day.

Makes approx 50-60 biscuits.

Ingredients

60g unsalted butter
1 tsp vanilla extract
220g sugar
2 eggs
260g plain flour
1/2 tsp bicarbonate of soda
100g chocolate of your choice (if using milk chocolate, lower sugar to 200g)
optional: 100g pistachios or other nuts, chopped

Method

Beat the butter, vanilla and sugar in a bowl. Add eggs, sifted flour and mix to create a smooth dough. Add in chopped chocolate and nuts. Chill in the fridge for 1 hour.

Preheat the oven to 160*C and grease a baking tray. Knead the dough on a floured surface until smooth. Halve the dough and roll into a log shape of around 30 cm or the length of your baking tray. Brush with milk, sprinkle with sugar and bake in the oven for 20 minutes until firm. Leave to cool completely before slicing diagonally into 1 cm slices. Heat the oven to 140*C, places sliced biscuits on a baking tray and bake for 15 minutes until dry, turning half-way.

How to bake the World’s Best Brownie

Standard

Brownies are great. Everybody loves a well baked brownie – you might know someone who doesn’t, but you only remember them because they are one in a million. This recipe is extremely versatile. It’s a rich, moist brownie that you can throw anything into to make it your own. The other great thing about this recipe is it is extremely difficult to get wrong – there is no danger of overmixing anything and it ending up as a chocolatey mess, and I have found that using the basic ranges of ingredients works just as well – just don’t tell anyone!

Ingredients

200g dark chocolate
250g unsalted butter (or baking spread/Stork)
300g sugar
1 tsp vanilla essence
4 large eggs
80g cocoa
1 tsp baking powder
65g plain flour

Method

Melt the butter and chocolate  in a bowl above a saucepan of boiling water slowly. You can do this in a saucepan directly, but just be sure to do it slowly and keep stirring it regularly – it will be fine. Add the sugar to a bowl (or a large jug) along with the vanilla essence. Pour in the chocolatey buttery mixture and stir well. Add the four eggs and mix thoroughly until smooth. Sieve the flour into the bowl and beat until smooth and silky – you can try very hard – but I have never found it possible to overmix this – just beating it with a wooden spoon until smooth works just fine. Line a brownie tin with baking paper (neatly – this is the most important bit!) and pour in the mixture. Gently bash the tin on the worktop Bake for around 15 minutes at 170° until the outside is cakey and the middle is still a bit squidgy. As a general rule – check your brownie and if it wobbles when you shake it – it needs longer – ideally 5 minutes after the time it stops wobbling. There is a varying degree of squidgyness so if you’re into eating your brownie with a spoon – you probably want to leave it for less time – mine turn out quite sturdy, but moist in the middle. This advice becomes very important when you start adding things like raspberries and cheeseecake topping.

Optional extras:

You might like to try adding chopped nuts, chocolate chips, cherries, fresh raspberries (you can add frozen too – but you’ll need to substantially increase the cooking time) or chopped stem ginger. Add to the mixture at the end.

If dark chocolate is not your thing – this recipe works just as well with milk chocolate – just knock the sugar down to 250g and the butter down to 200g.

Adding a cheesecake topping and swirling it through the mixture adds a wonderfully simple, yummy extra. Mix 150g cream cheese with 60g icing sugar and a tsp vanilla extract. Beat in one egg and dollop on top of the mixture. Swirl through with a skewer or knife. Alternatively pipe it in lines and sweep the skewer through it in alternate directions for a posh pattern.

You could use this mixture to create a base for a normal cheesecake, or a triple layered brownie cheesecake. I would recommend halving the recipe and adding the cheesecake and raspberry cream layers according to the recipe here. You could just as easily add a non-baked cheesecake mixture to the top of a thinner brownie base and chill to set. Any other ideas for how to use this ultimate brownie recipe would be greatly appreciated – post ideas below!

For more of our brownie ideas and thoughts, see Our Quest for the World’s Best Brownie.

How to shufty buttercream icing.

Standard

After the recent success of our post ‘Is cumin safe for cats?’ (for the answer, see here) I thought I would spend ten minutes of my newly discovered ‘free time’ to explain some other commonly searched terms that have landed people on our blog. I can’t help but feel people might be disappointed having searched for ‘cheese adventure’ and been delivered this pile of random recipes. They wanted to see some real hardcore cheese.

So here you go, cheese adventurers:

Here is a link to the website I found this on, just in case this isn’t enough cheese for you. It’s all about cheese eateries in Wisconsin and famous cheeseheads. Cool story.

I realise that we use a rather select vocabulary on our blog, which when writing to us sounds perfectly normal. However it has been made apparent that perhaps some of the more obscure words may need to be included in a short glossary.

jujjzzh, juzhj, zjujjzh, zhuzzh [jschu-jjzh] v:

1. to blend or chop with a hand blender or food processer eg. He jujjzhed up the soup to a smoother consistency.

syn: to whizz, to blend

shufty [shuff-tee] n:

1. the act of shuffling or jiggling items within a confined space eg. He gave the roast potatoes a shufty to spread them out.

mush [muh-sh] v:

1. to mash or squash an object eg. He mushed up the tomatoes.

whack [wa-ck] v:

1. to put something in a specific location, not necessarily with aggression eg. He whacked the pan in the oven.

Finally one of the other questions I feel we are truly lacking on is explaining to people how to make standard buttercream icing with only a limited amount of icing sugar. So, here goes.

Buttercream icing

Ingredients

icing sugar
soft, unsalted butter or margarine (eg. Stork)
vanilla extract
milk (optional)

Butter or margarine Icing sugar Vanilla Milk
10g 20g ¼ tsp ¼ tsp
20g 40g ¼ tsp ¼ tsp
30g 60g ¼ tsp ½ tsp
40g 80g ¼ tsp ½ tsp
50g 100g ½ tsp 1 tsp
60g 120g ½ tsp 1 tsp
70g 140g ¾ tsp 1 ½ tsp
80g 160g ¾ tsp 1 ¾ tsp
90g 180g ¾ tsp 1 ¾ tsp
100g 200g 1 tsp 2 tsp

Method

Soften the butter or margarine by beating it thoroughly in a bowl. Sieve in the icing sugar a quarter at a time and beat thoroughly between each addition. Mix in the vanilla before adding half the milk (roughly). If that makes it into a spreadable consistency leave it at that, if it still looks a bit firm, add the rest of the milk and even a bit more if you so wish.

Note: you’ll need the 100g butter and 200g icing sugar amounts to ice a standard sized cake of around 15cm diameter or 12 cupcakes. Though honestly, if I was icing cupcakes, I’m a huge fan of the Hummingbird Bakery Vanilla Frosting which is much lighter and tastier on cupcakes than this type of icing. Add colourings and sprinkles until your heart’s content.

So that concludes our cheese adventure and buttercream shuftying for one day. I hope you will now realise that buttercream is not a suitable consistency to shufty and therefore the title of this post is ridiculous – but maybe it was useful or at least made you drool over the sheer amount of cheese visible on one computer screen.

Enjoy.

Apricot & Rhubarb Galette

Standard

Galette, it appears to be me, is simply a fancy-pants Frenchy-wenchy way of saying “tart”. This recipe is adapted slightly from the cherry galette Smitten Kitchen cookbook I bought my sister for her birthday. I’m sure this would work equally well with all manner of stone fruit; peaches, nectarines, plums et cetera!

In making this tart I managed to make the amateur error of halving all the pastry ingredients bar the water, which is possibly the worst thing to include too much of! Fortunately I managed to save it and just had an extra large tart. I mean galette. Which is no bad thing in my book! This pastry could be used for any manner of sweet tarts/pies.

Pastry

Ingredients

110g plain flour
55g ground almonds
½ tsp salt
½ tbsp granulated sugar
2 tsp cinnamon
110g butter, straight from the fridge
60ml cold water

Method

Sieve the flour, almonds, salt, sugar and cinnamon into a large bowl. Add the butter in 1cm cubes and rub in with your hands (or one of these bad boys) until the largest blobs are the size of a pea. Stick in the fridge for five or ten minutes before adding the water, a third at a time, stirring in with wooden spoon or spatula until one large clump forms. The quicker you work the better. Wrap in cling film and stick in the fridge for at least an hour.

Tart

Ingredients

1 lot of pastry
30g ground almonds
1½ tsp flour
1 tsp cinnamon
2 tsp granulated sugar
15 butter, softened
¼ tsp almond extract
¼ tsp vanilla paste
1 large egg, separated into white and yolk
300-325g apricots (approx. 10) halved and stoned
125g rhubarb (approx. 1 stick), cut into ½ thick slices
apricot jam
1 tbsp coarse sugar

Method

While the pastry is in the fridge add the ground almonds, flour, sugar and cinnamon into a bowl. Vigorously mix in the butter, almond extract, vanilla paste and egg white until smooth. Stick in the fridge if not using straight away.

Preheat the oven to 200o/400oF/gas mark 6. Flour a work surface and a rolling pin, fetch the pastry dough and roll out to a 30cm circle. Transfer to a baking tray lined with baking parchment or buttered greaseproof paper. Spoon on the almond paste and spread evenly, leaving a 5cm border. Layer on the rhubarb and apricots (not going over the border). Fold over the excess like so, it needn’t be overly neat.

Whisk the egg yolk with a teaspoon of water and brush the folded over crust, then sprinkle with the coarse sugar. Dollop a little apricot jam over the fruit and spread it best you can.

Bake for 30-40 minutes until pastry is golden brown, turning halfway through for even browning. Serve warm or cold, with custard or cream or vanilla ice cream or any combination!

tarte aux abricots

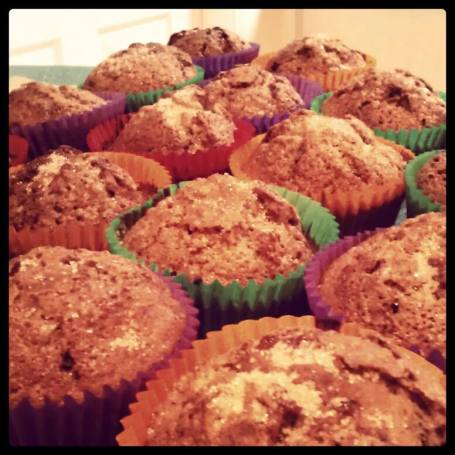
Banana and Cinna-nom Muffins

Standard

 This is a great way to use up those over-ripe bananas you have hanging around the kitchen. It’s taken from the Hummingbird Bakery Cookbook which I must say, reliably delivers some of the tastiest cake recipes of any book I own. Not too sweet, I imagine these are the type of muffins normal people would get away with eating for breakfast. I, on the other hand, have absolutely no qualms about eating any kind of muffin for breakfast, lunch and dinner. Nom.

ImageMakes 12-18 (depending on the size of your muffin cases).

Ingredients

350g plain flour
1 1/2 tsp baking powder
1/2 tsp bicarbonate of soda
2 tsp cinnamon
3/4 tsp salt
150g sugar
70g butter, melted
400g slightly over-ripe banana (approx. 3 large)
375ml butter milk (or milk with a teaspoon of lemon juice)
1 tsp vanilla extract (1/4 tsp paste)
1 large egg

for the cinnamon sugar:

3 tsp sugar
1/2 – 1 tsp cinnamon

Method

Add the dry ingredients – flour, sugar, baking powder, bicarb, cinnamon and salt – to a bowl. Mix to evenly distribute. In a separate jug, measure out the milk, add the egg and vanilla. Mix gently just to break up the egg. Add the butter and the milk to the dry ingredients and use an electric whisk on medium speed to mix them thoroughly. In another bowl, mash up the banana, leaving a few medium sized chunks. Add to your muffin mixture and beat to make sure it’s all combined.

Spoon into muffin cases and sprinkle over a bit of the cinnamon sugar for a slightly crunchy topping. Bake for 20-30 minutes at 160-170. If you have any cinnamon sugar left, sprinkle over the muffins as they come out of the oven.

Serve warm with tea if you can’t wait. As with most muffin recipes, these are better left for a day or so to mature – I find you lose less of the mix stuck to the paper.

I heard they freeze well, but I am yet to find out for myself.

W