Category Archives: Preserves

Homemade Chai in a Bottle

Standard

Makes approx. 1.5 litres chai concentrate

Ingredients
10 tea bags
2 cinnamon sticks
80g light brown sugar
3-inch piece of root ginger, grated
10 whole cloves
½ teaspoon freshly ground nutmeg
2 whole star anise
1 tsp fennel seeds
½ teaspoon of whole black peppercorns
peel of one orange (I peeled it like an apple, so the large strips won’t fit through the sieve at the end)
1 tablespoon of vanilla extract

Method

Add all ingredients except the teabags and vanilla extract to a large saucepan along with a litre of water and bring to the boil. Boil around 800ml water in a kettle and add to the teabags. Leave to soak for a few minutes and squeeze. Add the tea to the pan. Simmer for 20-30 minutes before straining to remove the bits. Add the vanilla extract and decant into bottles whilst still warm. Seal the bottles and allow to cool.

Store in the fridge once cool. I would guess (though this hasn’t been tested) it would keep for 2-4 weeks unopened and 2 weeks once opened. When required, pour out around 2cm of syrup (more or less depending on taste) into a cup before topping up with hot milk or boiling water.

Makes a great Christmas gift all dressed up with ribbons, tags and a cinnamon stick and would also be nice as a flavouring in cakes and traybakes.

Cheese, Onion and Mustard Swirls

Standard

We love swirls. Sweet or savoury, they are an easy way to make eye-catching office munchies or a traybake to share at a party. These swirls are a take on a recipe from the Smitten Kitchen cookbook, which we handily ‘borrowed’ from G’s sister on an extended (never-ending) loan. Oh well. More time to bake all of the deliciousness.

IMG_20131014_201239

Makes 24 perfect for sharing or 12 as more of a substantial lunch.

Ingredients

375g plain flour
1 tsp salt
black pepper
1 tbsp sugar
7g dried fast-action yeast
150 ml milk
80 ml water
55g butter, melted, plus a bit extra
1 medium onion
170g cheddar
1 tbsp wholegrain mustard
salt and pepper
1 tbsp onion chutney

Method

Begin by making up the dough. Sift the flour into a large mixing bowl, add the salt to one side of the bowl and yeast to the other. Throw in the sugar and pepper wherever you fancy. Pour in the melted butter, add the milk and mix well, then continue to add the water more slowly until you reach a slightly sticky-consistency dough. Throw out onto a lightly floured surface and knead for around ten minutes.

Leave to prove in an oiled bowl until doubled. Meanwhile if you fancy, you can begin grating the cheese and the onion into a bowl.

When the dough has proved, tip out onto a well-floured surface and roll out to approximately 48 cm x 30 cm if you want many to share, or 36 cm x 30 cm if you want them more for a substantial snack. Brush on a little melted butter to help everything stick before spreading on the mustard. Season well. Sprinkle on the cheese and onion evenly before rolling towards you, along the 48 cm or 36 cm edge, to make a tight roll.

Cut the roll into 24 x 2 cm slices if making them to share or 12 x 2.5 cm swirls if making them for lunch. Line one or two deep baking trays with baking paper (depending on how many you’re making). Fit 12 swirls snugly into the tray – obviously if making 24 smaller swirls, you will need two trays. Leave to prove for around an hour in a warm place until the swirls are merging into each other.

Bake for 20-25 minutes at 170*C until golden brown. Whilst they are still hot, mix the chutney with the water in a small glass or bowl. Brush the tops of the swirls with the glaze to give a wonderful sticky shine that makes them look irresistible.

Yum.

Home-Made Christmas Mincemeat

Standard

My recent mincemeat swirl recipe has been a huge success in our house. Not only have me and my house-mates now made around 5 batches between us, it has spread beyond – to family, friends, tutors…! We now consumed over 6 jars of mincemeat this year so I thought it was about time I branched out and came up with a recipe for my own.

This recipe has been adapted from lots of individual recipes online and from family and friends to get the best of both when it comes to taste and cost. All in all, this recipe comes in at around £5-7 (based on Morrison’s own brand ingredients, Dec 2012) but it makes a tonne of beautiful, home-made mincemeat, perfect for presents or just for your own personal (never-ending) stash of mince pies. Compared to other mincemeat recipes that use brandy or whisky to soak the fruit, this one not only gets bonus points for value, but the flavour of the mulled wine adds so much more to the mix too.

Unlike some recipes, this does not require any cooking, like jams or chutneys. However, for a more sticky, jam-like mincemeat, heating the soaked fruit and juices with 3 tbsp water, in a saucepan on a low heat for 20 minutes. This could be done before putting it into jars or using in your recipe. I would advise doing this if making open tarts or the mincemeat swirl recipe.

Makes approx 3-4lb.

Ingredients

1kg mixed fruit and peel (stuff from the value range is fine, we won’t tell)
180g vegetable suet
1 orange, zested and juiced
1 lemon, zested and juiced
500ml mulled wine (or red wine plus extra ground spices)
2-3 apples, chopped (bramley or eating – whatever you have around)
1-2 tsp ground ginger
1-2 tsp ground cinnamon
1 tsp nutmeg
pinch of mixed spice

Optional:
150g brown sugar (will make it sweeter but will probably help it keep for longer)
75g almonds (or other similar nuts), chopped

Method

Chop the apple into small chunks. Throw everything but the suet into a large bowl and cover with clingfilm -alternatively, use a large saucepan with a lid. Leave in your kitchen overnight, at room temperature, stirring regularly to allow the fruit to soak up all the juice. In the morning, add the suet before spooning into jars.

Keep in a cool dark place. If you have time, your mincemeat will appreciate 2 weeks to allow the flavours to enhance, but if not, it tastes pretty good the same day!

In the unlikely event that you have any of this mincemeat left over after Christmas, it will probably keep for a few months, unopened. However I would be reluctant to keep it for more than 6 months due to the lower alcohol content in this recipe compared to standard ones using brandy or whisky without adding the extra sugar. But, your choice.

Berry Purple Chutney

Standard

Ooooh, see what I did there? Clever. ‘Cause it’s got berries in and it’s purple. See?

Makes about 1lb

Ingredients

600g blackberries
2 red onions, chopped
1 red chilli, finely chopped
100g caster sugar
4 thumb-sized pieces ginger, finely chopped
3 tbsp wholegrain mustard
1 tsp cayenne pepper
1 lemon, halved (for pectin)
3-4 pieces cooked beetroot
100ml red wine vinegar
50ml balsamic vinegar

Method

Combine all the ingredients apart from the vinegars and beetroot in a deep casserole dish. Stir over a medium heat until most of the blackberries have smushed down (approx. 20 minutes). Add the vinegars and beetroot and simmer until thick (approx. another 20-30 mins) stirring as and when. Leave to cool before transferring to sterilised jars.

The way I tell whether it’s a good consistency is drawing a spoon through the mixture – if liquid immediately fills the gap then keep it simmering, if liquid oozes in slowly then your pretty much done! It’s not very scientific but it works well enough for me.

J

Summer Berry Jam

Standard

If you are looking for a definitive jam recipe from someone who knows what they are doing this is not it. I sort of made this up as I went along and the recipe that follows is how I may do this in future knowing now what I did right/wrong. I will highlight all the mistakes I made so hopefully you won’t make them too! It still tastes pretty epic by the way but if you want something foolproof…I recommend going elsewhere!

This makes quite a tart jam, so if you have a sweeter tooth obviously up the sugar.

Makes…quite a lot!

Ingredients

1.5 kg summer berries, I used (575g blackberries, 500g raspberries, 500g blackcurrant and 200g blueberries. I realise that doesn’t add up to 1.5 kg but I’m trying to make the weights a bit more scalable)
500g sugar*
6 tbsp orange juice
4 tbsp lemon juice (+keep the lemon, pips** and all)
2 tbsp lime juice (+ keep the lime, pips and all)
handful fresh rosemary
handful fresh thyme
handful fresh lavender
3 tsp vanilla essence
2 tsp ground nutmeg

Method

Squeeze your juices into a deep pan (as deep & wide as you can: jam is like magma when boiling and it has a tendency to jump out and attack you). Get your herbs, put them in a piece of cloth or something porous, with the remains of the lemon and lime (pips and all!) and bind with some twine. Crush with your hands to release the smelly loveliness. This would be a good point to sterilise some jars for preserving, so fill a bowl with soapy water, set the oven to a low heat, wash the jars then stick them in the oven to dry. (Read here for a little more info).

Add 2/3 of all the fruits to the fruit juice over a medium heat and bung in the lovely smelly sack. DON’T ADD ANY EXTRA WATER***. Stir regularly with a spoon and after 10-15 minutes add the sugar, nutmeg and vanilla essence. Continue to bubble away until the fruit is reduced and mushy and somewhere between liquid and solid. Add your remaining fruit – this way you get some mushed-down, jelly-type spread and hopefully some whole fruit too, yippeee – and turn the heat right up for 10 minutes or so. Really my timings are very rough – leave it as long as you deem necessary, the longer you do obviously the stiffer your jam will be.

Please be aware the area around the pan can and will get fairly splattered so don’t wear your favourite-brand-new-turquoise-shorts-that-are-so-good-your-girlfriend-steals-them****.

Remove your jar/s from the oven when dry and immediately fill with the hot jam – a funnel is really useful at this point. Seal the jars as soon as they are full so a vacuum is formed. Leave on the side to cool for a few hours before putting in the fridge, otherwise the glass is liable to crack due to the rapid change in temperature.

Serve on toast, in peanut butter and jam sandwiches (I used to be a non-believer, but my god they are awesome – honestly if you’ve never tried one you really ought to), in puddings, y’know, wherever you usually use jam…!

My Mistakes

*I used 300g of sugar (initially only 200!) and having had it for my lunch to say I have to say it was a little on the…tangy…side, even for me (and I’m usually one for cutting down the sugar in recipes by a lot).

**I didn’t include the pips but apparently they are a big source of pectin which is what is put in jam/jam sugar to help it solidify. So include yours!

***I added 100ml of water – BIG MISTAKE. The berries create plenty of liquid themselves and the extra water just meant it took forever to reduce. Honestly, although it might not seem like it at first you don’t need to add any.

****I got jam splodges on my favourite-brand-new-turquoise-shorts-that-are-so-good-your-girlfriend-steals-them *shock*. Fortunately my dad was there to very kindly wash them while I continued to tend to my jam…in my boxer shorts…

And on that beautiful image I shall leave you! Have a jamtastic time ;]

Caramelised Red Onion Chutney

Standard

That’s right folks, we’re back on the chutney bandwagon. This one is sweet, tangy and comes with a bit of a kick.

Makes 1½ lbs

Ingredients

7 red onions, chopped
2 white onions, chopped
1 pepper – red, yellow, orange, green, purple, whatever! – chopped
4-5 cloves of garlic, finely chopped
2-3 chilli peppers, finely chopped
120g dark brown sugar
275 ml balsamic vinegar
50ml red wine vinegar
4 sprigs rosemary, finely chopped
3 bay leaves
stick of cinnamon

Method

Again, apologies for all the chopping. It should look something like this by the end of it all:

If you’re not crying your eyes out with all those onions then you’re made of sturdier stuff than us!

Heat some oil on a low heat in a big pan and add the onion, garlic, bay leaves, rosemary and cinnamon stick. Cook for 15-20 minutes until soft then add the pepper and chilli and cook for a further 5 minutes. Add all the vinegar and sugar and reduce, still on a low heat, until thick and sticky. Remove the bay leaves if they start to go too soggy. Spoon into sterilised jars or throw some straight onto a fat wedge of cheese and scoff shamelessly.

J&W

Mango Curd & Raspberry Tarts

Standard

So we had a mango just casually hanging around our fruit bowl, like you do. It had been there a while, not doing a lot apart from exuding mango-y-ness. (It’s a word, alright?). I was going to make me some badass mango chutney but after some research found that one measly mango was nowhere near enough. After a little further digging I unearthed these beauties. So, if it ever so happens that a mango casually wanders into your life  and you’re not really sure what to do with it, you could do a lot worse than sticking it in one of these scrummy yummies. You will need to do these over two days, so bare that in mind!

Makes approx. 36 mini tarts.

Pastry

Ingredients

180g plain flour
80g butter
80g icing sugar
45g ground almonds
45g polenta
pinch of salt
1 egg
1 tspn vanilla essence

Method

Get your butter out of the fridge (or, y’know, wherever you happen to keep it) and leave out to soften for a few minutes. Sieve the flour, icing sugar, ground almond, salt and polenta into a large bowl. (If you don’t have polenta, ground semolina would also work – it gives the pastry a nice texture, a crunch). Cut the butter into chunks and add to the dry ingredients, forming crumbs with your finger tips. Whisk up the egg and add a bit at a time to the mix, either stirring in with a spoon or mixing in with your fingers. Work until it comes together into a ball, adding more flour if the mixture is too wet or water if it’s too dry – only a little at a time though.

Wrap your pastry ball in cling film and stick in the fridge. I left mine over night simply because I also had to wait for my curd to set…and talking about curd…here’s the recipe, stolen (and slightly edited) from smittenkitchen.

Mango Curd

Ingredients

1 mango
70g caster/granulated sugar
3 tablespoons lime juice
2 tablespoons lemon juice
pinch of salt
4 egg yolks
50g butter

Method

Peel your mango. Mine was ripe so I was able to peel it with a peeler (crazy times) though apparently you will usually need a sharp knife. Cut into small segments and throw in a metal/glass bowl. Add the sugar, lemon and lime juice, sugar and salt and mash up roughly with a fork. If you have one, use a hand-held blender (a “zhuhzher” in the world of J&W) to reduce to a thick, smooth pulp. If not mash with a fork then strain through a sieve.

Zhuhzh, sorry, whisk in the egg yolks until completely mixed then stick the bowl over a saucepan of simmering water. Continually stir for 10-15 minutes, or until the mixture gets thicker. If you have a food-thermometer, the magic number you’re after is 170oF/75oC. Take the mango-y-goodness off the heat and add the butter in 4-5 small chunks, stirring each one until fully melted and mixed before adding the next. Stick the mixture in the fridge overnight.

(On eating I think this was quite sweet, so I would lower the sugar in future and increase the lemon and lime).

Raspberry Smush

Ingredients

cereal bowl of raspberries
squeeze of lemon juice
(sprinkling of sugar)

Smush the raspberries through a sieve  into a saucepan with the back of a large spoon, making sure no pips get in. You can get a surprising amount of liquid out of them, so keep smushing for a good few minutes. Squeeze in the lemon juice and sprinkle on just a little sugar and give it a quick mix through. Reduce down to a thicker, gloopy sauce.

Don’t You Just Love It When a Pudding Comes Together

Heat the oven to 350oF/180oC/gas mark 4. Roll out the pastry until it is approximately the thickness of a pound coin. Use a cookie cutter/glass/suitable cutting implement to cut out 25-35 3 inch rounds and stick each into a tart mould. I don’t have any of these, so mine went into 3 pre-buttered shallow muffin trays. Line each tart with parchment paper and a few baking beans (rice is a good substitute, though has the potential to get everywhere!).

Blind bake for 10-15 minutes, until brown. Remove from moulds and leave to cool in the tin for a few minutes before removing the beans and sticking them on a cooling rack.
After a few minutes line each pastry case with a thin layer of raspberry smush, then a thicker layer of mango curd. If you fancy, add an artistic raspberry swirl in the top of the curd – a cocktail stick is perfect for this.
Top with a couple of fresh raspberries/blueberries/any berry you fancy. Stick back in the fridge. Tadahhhh. Mangoodness.

You *could* whip up some meringue with the egg whites you have, but I’m lazy and not that big a fan of meringue so I…err…didn’t.

P.S. My cat is called Mango. Please do not use my cat in your recipe. I’m not sure he’d appreciate it.

J
Afternoon Tea: The Finished Article

Standard

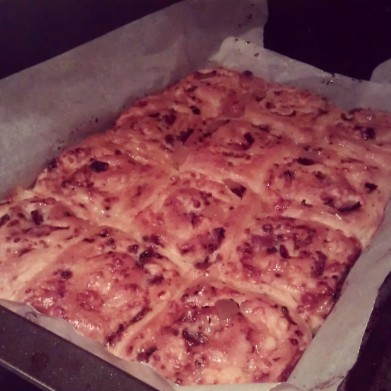
So, after 2 hours of chopping, stirring, boiling and baking we (re)created possibly the best cream tea we have ever had. Boom. Make sure to check out the recipes below the picture!

J&W

We had our savoury scones with some extra mature cheddar (anything less is a crime) and could have done with some clotted cream with our sweet scone, alas…we were too lazy to go to the shop…!

Based on the menu of Cordial and Grace tea-shop in Bristol.

Recipes:

Cheddar & Mustard Scone
Tomato & Red Onion Chutney

Stem Ginger Scone
Rhubarb & Ginger Jam

Tomato & Red Onion Chutney

Standard

When in Bristol for the Jubilee weekend we had afternoon tea at a wonderful little café. It consisted of savoury and sweet scones, with chutney and jam respectively. They were so bloody scrumptious we thought we’d attempt to replicate them. Here is the recipe for our savoury chutney. The corresponding savoury scone recipe is here, the sweet scone here and the jam here. Magic.

Ingredients

Makes 1lb

400g ripe tomatoes
3 cooking apples
200g light muscovado sugar
2g pectin (optional)
300g red onions
200g raisins
1 tsp salt
1 tsp ground ginger
150ml cider vinegar
50ml balsamic vinegar
1 clove of garlic
1 tsp rosemary

Method

Chop up all the vegetables into small chunks. Grate the garlic. Put all the ingredients (except one chopped apple – save this until later) into a large pan and bring to the boil over a medium heat. Keep checking on it and stir regularly, it should take around an hour for the sauce to thicken but this is just a guide. Add the remaining apple when you feel that your chutney is at a suitable consistency and reduce for a further 5 minutes. This will give your chutney a bit of extra bite and as fans of crunch in spreads (chunky pickle and whole nut peanut butter for example) this is good by us. Take it off the heat and spoon it into hot, sterilised jars. Seal the jars and allow to cool. Keep in the fridge and eat within a few months.

*Tip Alert*

Sterilising jars

There are a few ways of doing this, but we find the easiest is to wash them by hand in hot soapy water. Dry them in the oven on a very low setting (around 70°) for around ten minutes. Put the jam into the jars whilst both are still hot. Remember that if you cool glass jars very quickly (put them in cold water whilst still hot) they will probably crack, so don’t do that.

J&W

Rhubarb & Ginger Jam

Standard

When in Bristol for the Jubilee weekend we had afternoon tea at a wonderful little café. It consisted of savoury and sweet scones, with chutney and jam respectively. They were so bloody scrumptious we thought we’d attempt to replicate them. Here is the recipe for our sweet jam. The corresponding sweet scone recipe is here, the savoury scone here and the chutney here. Magic.

Ingredients

1kg  rhubarb
400g jam sugar (or caster sugar and 8g pectin)
30g stem ginger
6cm piece of root ginger
juice of 1 lemon
1 tsp vanilla extract

Method

Wash and chop the rhubarb into 1cm slices. Chop the stem ginger and  grate the root ginger. Add to a large pan with the sugar and other ingredients. Bring to the boil over a medium heat. Note, you do not need to add any liquid to this as the rhubarb will smush down. Simmer on a low heat for around an hour, but use your common sense; the sauce should be thick and slightly sticky. Quite like jam. In fact, very like jam. Try cooling a small amount on cold plate to see if it is ready. It will thicken on cooling, so  bear this in mind.

Pour into a sterilised jar and leave to cool. Keep in the fridge. At a guess, it would be best eaten within 8 weeks. But we will not be liable for any stomach bugs incurred if eaten before or after this length of time. It was chosen somewhat arbitrarily. Who knows, it might be 16 or it might be 4, ours probably won’t last that long anyway…!

*Tip Alert*

Sterilising jars

There are a few ways of doing this, but we find the easiest is to wash them by hand in hot soapy water. Dry them in the oven on a very low setting (around 70°) for around ten minutes. Put the jam into the jars whilst both are still hot. Remember that if you cool glass jars very quickly (put them in cold water whilst still hot) they will probably crack, so don’t do that.

J&W