Category Archives: Gifts

Homemade Chai in a Bottle

Standard

Makes approx. 1.5 litres chai concentrate

Ingredients
10 tea bags
2 cinnamon sticks
80g light brown sugar
3-inch piece of root ginger, grated
10 whole cloves
½ teaspoon freshly ground nutmeg
2 whole star anise
1 tsp fennel seeds
½ teaspoon of whole black peppercorns
peel of one orange (I peeled it like an apple, so the large strips won’t fit through the sieve at the end)
1 tablespoon of vanilla extract

Method

Add all ingredients except the teabags and vanilla extract to a large saucepan along with a litre of water and bring to the boil. Boil around 800ml water in a kettle and add to the teabags. Leave to soak for a few minutes and squeeze. Add the tea to the pan. Simmer for 20-30 minutes before straining to remove the bits. Add the vanilla extract and decant into bottles whilst still warm. Seal the bottles and allow to cool.

Store in the fridge once cool. I would guess (though this hasn’t been tested) it would keep for 2-4 weeks unopened and 2 weeks once opened. When required, pour out around 2cm of syrup (more or less depending on taste) into a cup before topping up with hot milk or boiling water.

Makes a great Christmas gift all dressed up with ribbons, tags and a cinnamon stick and would also be nice as a flavouring in cakes and traybakes.

Chocolate Biscotti

Standard

wpid-IMG_20130808_133717.jpg

These make a great biscuit to dunk in tea. Once baked, they will keep for up to a week but they also freeze well if you choose to save some for another day.

Makes approx 50-60 biscuits.

Ingredients

60g unsalted butter
1 tsp vanilla extract
220g sugar
2 eggs
260g plain flour
1/2 tsp bicarbonate of soda
100g chocolate of your choice (if using milk chocolate, lower sugar to 200g)
optional: 100g pistachios or other nuts, chopped

Method

Beat the butter, vanilla and sugar in a bowl. Add eggs, sifted flour and mix to create a smooth dough. Add in chopped chocolate and nuts. Chill in the fridge for 1 hour.

Preheat the oven to 160*C and grease a baking tray. Knead the dough on a floured surface until smooth. Halve the dough and roll into a log shape of around 30 cm or the length of your baking tray. Brush with milk, sprinkle with sugar and bake in the oven for 20 minutes until firm. Leave to cool completely before slicing diagonally into 1 cm slices. Heat the oven to 140*C, places sliced biscuits on a baking tray and bake for 15 minutes until dry, turning half-way.

Home-Made Christmas Mincemeat

Standard

My recent mincemeat swirl recipe has been a huge success in our house. Not only have me and my house-mates now made around 5 batches between us, it has spread beyond – to family, friends, tutors…! We now consumed over 6 jars of mincemeat this year so I thought it was about time I branched out and came up with a recipe for my own.

This recipe has been adapted from lots of individual recipes online and from family and friends to get the best of both when it comes to taste and cost. All in all, this recipe comes in at around £5-7 (based on Morrison’s own brand ingredients, Dec 2012) but it makes a tonne of beautiful, home-made mincemeat, perfect for presents or just for your own personal (never-ending) stash of mince pies. Compared to other mincemeat recipes that use brandy or whisky to soak the fruit, this one not only gets bonus points for value, but the flavour of the mulled wine adds so much more to the mix too.

Unlike some recipes, this does not require any cooking, like jams or chutneys. However, for a more sticky, jam-like mincemeat, heating the soaked fruit and juices with 3 tbsp water, in a saucepan on a low heat for 20 minutes. This could be done before putting it into jars or using in your recipe. I would advise doing this if making open tarts or the mincemeat swirl recipe.

Makes approx 3-4lb.

Ingredients

1kg mixed fruit and peel (stuff from the value range is fine, we won’t tell)
180g vegetable suet
1 orange, zested and juiced
1 lemon, zested and juiced
500ml mulled wine (or red wine plus extra ground spices)
2-3 apples, chopped (bramley or eating – whatever you have around)
1-2 tsp ground ginger
1-2 tsp ground cinnamon
1 tsp nutmeg
pinch of mixed spice

Optional:
150g brown sugar (will make it sweeter but will probably help it keep for longer)
75g almonds (or other similar nuts), chopped

Method

Chop the apple into small chunks. Throw everything but the suet into a large bowl and cover with clingfilm -alternatively, use a large saucepan with a lid. Leave in your kitchen overnight, at room temperature, stirring regularly to allow the fruit to soak up all the juice. In the morning, add the suet before spooning into jars.

Keep in a cool dark place. If you have time, your mincemeat will appreciate 2 weeks to allow the flavours to enhance, but if not, it tastes pretty good the same day!

In the unlikely event that you have any of this mincemeat left over after Christmas, it will probably keep for a few months, unopened. However I would be reluctant to keep it for more than 6 months due to the lower alcohol content in this recipe compared to standard ones using brandy or whisky without adding the extra sugar. But, your choice.

Peanut Butter Cupcakes

Standard

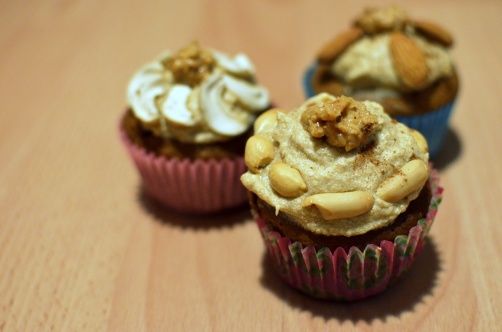
There’s something really nice about how peanut butter cupcakes sounds as it rolls off the tongue. I think it might be the combination of Nuh-Buh-Cuh, if you get what I mean? No…well, I don’t blame you.

I made these a while ago and unfortunately, as tends to happen, life got in the way of me uploading the recipe. They were for my housemate’s birthday and I had to make them, wash up and tidy away in under an hour to keep them a surprise! I ended up icing them in my bedroom just in case she came into the kitchen…

They are relatively “mild” on the peanut butter front. Or at least I think so. Feel free to use substitute more of the butter for peanut butter. God knows I would, but not everyone likes peanut butter as much as I do…

Makes approx 12-14

Ingredients

75g butter
110g peanut butter
200g brown sugar
1 egg
1 tsp vanilla extract
260g plain flour
½ tsp salt
½ tsp baking powder
½ tsp bicarbonate of soda
1tsp cinnamon
1 tsp ginger
180ml milk

Icing

75g butter
165g icing sugar
3 tsp water
1 tsp cinnamon

Method

Preheat the oven to 180oC/350oF/gas mark 4 and line a muffin tray with muffin cases.

In a large bowl, cream together the butter, peanut butter and brown sugar. It helps if your butter is soft to begin with, so either take it out the fridge and stick it in your warming oven for a few minutes. Careful not to let it melt though. Once “fluffy and light” or once your arms get too achey to cream anymore, beat in the egg and vanilla extract.

In a separate bowl, sieve together the flour, salt, baking powder, bicarb and spices. Add about a quarter to the butter/sugar/egg mix, stir in, add a quarter of the milk, stir in and then repeat until you have no flour or milk left. Fill the cupcake cases ¾ full and stick in the oven for approximately 20 minutes.

While they’re baking, cream all the icing ingredients together in a bowl. Again, soft butter helps here (though I wouldn’t put it in the oven this time). Try not to “over” cream it as it will start to separate, for reasons unbeknownst to me!

Check the cakes in the usual manner by inserting a knife or skewer into the middle of one of the cakes to see if it comes out clean – if not put back in for a couple of minutes and check again/repeat until done.

Leave to cool before icing, otherwise the butter will melt and you’ll have some fairly disgusting looking cupcakes. I topped mine with a dollop of peanut butter and various nuts to make them as birthday-tastic as I could.

SOMUCHNUTTINESS

Savoury Swirls, Two Ways

Standard

So it was my last day at work on Wednesday and as is customary whenever something moderately eventful takes place (birthday, being late, being early, being alive…) it is expected you bring in something edible. Almost always the food tends towards the sweet and absolutely always, unless I’ve had anything to do with it, is shop-bought. But not today, ohhh no!

The recipe for the dough for these delightful savoury snacks is stolen completely from Brendan of The Great British Bake-Off Fame. The fillings, however are entirely my own creation.

I doubled Brendan’s quantity and made a lot (we’re talking tipping the scales at over 100 here) roughly 2 inch diameter by 1 inch high swirls. So I’m going to halve his recipe which should give you approximately 20-24 swirls.

Ingredients

Dough

400g plain flour
10g dried yeast, reactivated
6g salt
50ml olive oil
250ml warm water

Balsamic Red Onion, Cheese & Ham

2 red onions, diced
90g gruyére
30g gouda
30g cheddar
2 slices ham, diced
splash balsamic vinegar
pinch of sugar
salt/pepper/’erbs/spices to taste

Pesto, Feta & Sundried Tomato

100g feta, crumbled
50g pesto
8 sundried tomato, chopped
handful fresh basil, ripped
2 tomatoes, grilled & skinned
1 red pepper, grilled & skinned

Method

Dough

In a bowl mix the flour and salt and the oil a few glugs at a time, stirring between each glug to incorporate it. Do the same with the reactivated yeast, stirring in a little at a time and then finally with the water.

**Note: if you are reactivating yeast in water, remember to take away that quantity of water from the 250ml you need to add. It’s 250ml total, not 250ml + reactivated yeast water!**

Drizzle a little oil in the bowl, place the dough in, rolling it around in the oil so as it grows it doesn’t stick to the sides. Put in a warm place – airing cupboards are great – and leave to double in size (approx. 40-60 minutes). Meanwhile make your filling/s.

Balsamic Red Onion, Cheese & Ham

Heat a dash of oil in a frying pan over a medium heat. Add the diced onions and sweat for a couple of minutes, before adding a good glug balsamic vinegar and a sprinkling of sugar/golden syrup, salt, pepper and whichever herbs and spices you fancy (I went for W’s recommendation of rosemary and basil). Continue to sweat for 6-7 more minutes, adding a little water if your pan goes dry. Remember the onions will continue to cook in the oven so leaving them with a little bite left in them is probably a wise move!

Grate all your cheese into a bowl, add the chopped ham, a good few twists of pepper and hey presto your filling is ready

Pesto, Feta & Sundried Tomato

Optional: Removing Pepper & Tomato skins

Cut the pepper and tomatoes into quarters, removing all the pips/liquidy innards. Place under a hot grill, skin side up for a few minutes, until the skin is blackened over the majority of the surface – you may need to manoeuvre them around to achieve this. Once the skin is blackened add them to a sandwich bag, seal and leave to steam for a further few minutes. The skin should start to peel away and you can finish the job with your fingers. It can be a bit tricky and in all honesty I’m not sure whether it’s worth it but I’ve put it up here for you to make your own decisions! Finally chop/rip them up into small chunks.

Crumble the feta into a bowl and add the chopped sundried tomatoes and basil leaves.

Roly-Poly Time

When the dough has doubled in size, remove and place on a floured surface. Flour your rolling pin (it will stick due to the oily nature of the dough) and roll out into a rectangle approx 4mm thick, where the long side is approximately twice that of the short side. Then either:

1. Sprinkle the entire thing with the balsamic red onions, then cheese and ham – aim for a roughly even coverage.

Or

2. Spread a thin layer of pesto over the surface before adding the crumbled feta, sundried tomatoes, basil, and grilled peppers/tomato chunks

Roll up (roll up!) from one long side to the other, slice into rounds 1 inch thick and place on baking paper on an oven tray. Here you can “re-prove” your dough for half an hour back in the warm, or you can just whack them straight in the oven, preheated to 190oC/375oF/gas mark 5 for approximately 30-40 minutes, or until golden brown. After half an hour take one out, cut it in half and see whether it’s still doughy inside – if so stick back in for a few minutes then check again.

Serve piping hot – they taste pretty good cold but nowhere near as good as straight from the oven. Share amongst friends and work colleagues…or, y’know, scoff the lot y’self.

J(&W a bit)

Balsamic Red Onion, Cheese & Ham

Feta, Pesto, Sundried Tomato & Red Pepper

Berry Purple Chutney

Standard

Ooooh, see what I did there? Clever. ‘Cause it’s got berries in and it’s purple. See?

Makes about 1lb

Ingredients

600g blackberries
2 red onions, chopped
1 red chilli, finely chopped
100g caster sugar
4 thumb-sized pieces ginger, finely chopped
3 tbsp wholegrain mustard
1 tsp cayenne pepper
1 lemon, halved (for pectin)
3-4 pieces cooked beetroot
100ml red wine vinegar
50ml balsamic vinegar

Method

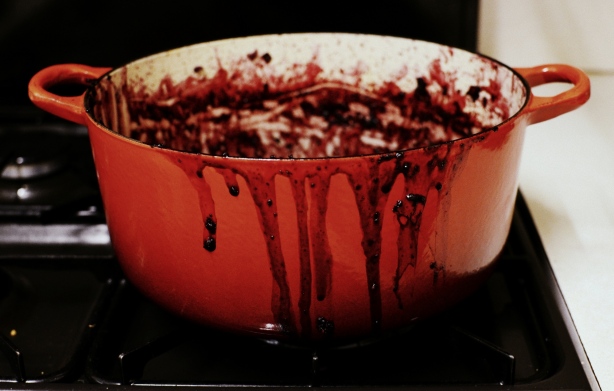
Combine all the ingredients apart from the vinegars and beetroot in a deep casserole dish. Stir over a medium heat until most of the blackberries have smushed down (approx. 20 minutes). Add the vinegars and beetroot and simmer until thick (approx. another 20-30 mins) stirring as and when. Leave to cool before transferring to sterilised jars.

The way I tell whether it’s a good consistency is drawing a spoon through the mixture – if liquid immediately fills the gap then keep it simmering, if liquid oozes in slowly then your pretty much done! It’s not very scientific but it works well enough for me.

J

Stem Ginger Shortbread

Standard

One for you two for me. I made this recipe as a birthday offering for my Dad. Having probably still got some remains of the cake I baked 2 weeks ago, plus a cake from Tesco that he bought for my mum’s birthday, I decided to bake him something a bit different.

And I was hungry.

So I baked a batch of stem ginger shortbread for him. And two for me.

Ingredients

100g butter
50g caster sugar + a small bit for sprinkling on top
130g plain flour
20g cornflour
1/2 tsp ground ginger
pinch salt
20g (approx. one ball) stem ginger

Method

Preheat oven to 160*C. Cream butter and sugar in a mixing bowl until pale and creamy. Weigh out the plain flour and corn flour in a separate bowl, add the ground ginger and salt. Finely chop the stem ginger into little pieces and add to the flour. Coat the ginger pieces in the flour before adding the whole lot to the butter-cream. Mix with your hands to combine the ingredients, trying not to handle it too much as shortbread does not like being warm. Form a solid dough before rolling out into a 5 cm diameter roll. Chill for at least 30 mins.

Now you have two options:

1. Do as I did and slice the roll into 0.5 cm slices with the sharpest knife you have. This can lead to smushed circles, but with a little reshaping will be relatively less handled and therefore happier shortbread.

2. Insist on circular perfection by rolling out the dough and cutting 5 cm discs with a cutter. Note the more you rework the leftovers from each batch, the more you will sacrifice on texture of your shortbread.

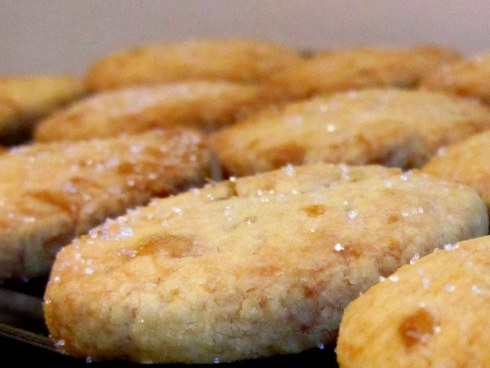
Up to you. Either way, plonk your biscuits on a greased baking sheet and pop in the oven for around 15-20 minutes. Take them out at the first hint of browning. Sprinkle over a little sugar and leave to cool on the baking tray to firm up a little. After at least 5 minutes, you can transfer to a cooling rack.

Unlike most baked goodies, I am not a huge fan of these warm (?!?!). I know this because I am greedy and tried one straight from the oven. I advise you to wait until they are cool. Serve with tea and friends.

W

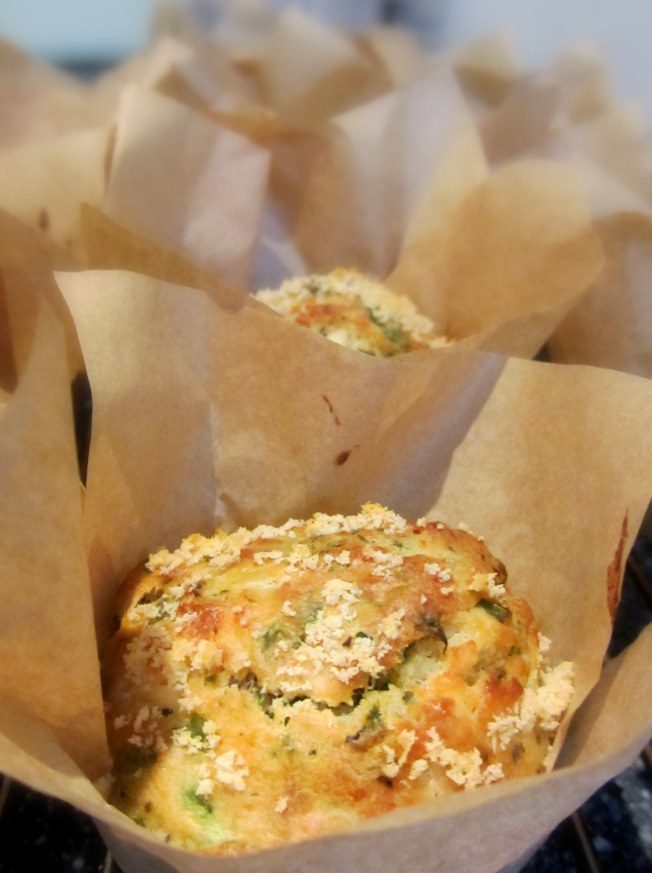
Spinach & Feta Muffins

Standard

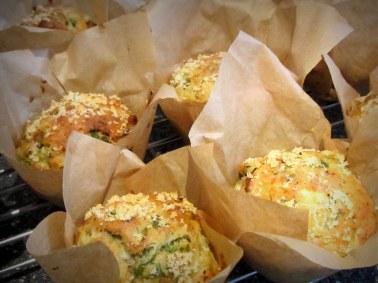
I made these lovely, little mouthwatering muffins after seeing some savoury muffins at the Real Food Market at the weekend. Probably the best thing I ever did? I can’t get enough of them. And J can’t wait to take one…or two…or three for his lunch. If there are any left that is.

W

Recipe, courtesy of chillimarmalade.


Our Quest For The World’s Best Brownie: Update

Standard

As anyone who has read our blog will attest, we are on a never-ending quest for The World’s Best Brownie. It’s a difficult task but someone has got to do it. This latest entry comes from London, a RealFood Market to be more precise and Outsider Tart to be preciser still.

We were down in London to catch some athletics after picking up Paralympic Fever while suffering Post-Olympic Blues (both genuine medical conditions). It. Was. Incredible. Words cannot do justice to how well everything worked, from the train connections, to the ever-so-friendly “games-makers”, via some free (!) ice-cream, chocolate and pretzels. The stadium was a marvel – we were literally in the very last row and still felt a part of the action – the atmosphere  electric, the crowd fantastic, the sport exceptional. But we’re not here to talk about that. We’re here to talk about brownie.

Before leaving for London we made a plan to try something different from the usual lunch and hunt down some exceptional street food. And hunt it down we did.

More on our main courses later, for now we’ll stick to pudding, coming courtesy of two quirky Americans and their mouth-watering cake stall. Laid out before us were what must have been 15 varieties of thick, fat, squares of brownie, enormous amorphous cookies and halfway-house cookie-brownies. To say the choice was impossible would be a lie. But only a small one.

Eventually we went for one Cinnamon & Walnut Dark Chocolate and one Chocolate Peanut Butter. Rich, chammy, sweet, delicious, what’s the word we’re looking for here…oh, yeah: AMAZING. At £2.50 a pop you get plenty of gooey-goodness for your hard-earned buck. They kept us going well into the night, with a nibble here and a gobble there. Omnomnom.

Having returned home we have since discovered these wonderful American brownie-GODS have their own website AND cookbook. (Guess what’s just gone on our Christmas list). It’s just a shame they don’t deliver outside London, though we might have to email them about that – J’s sister has sent him birthday brownies through the post before with no serious repercussions…!

If you’re in the London area really do check these guys out. In fact, make an extra effort to try out as much street food as you can, it’s made by real food-lovers more interested in flavour than being able to pay the rent. But if you can help them do that too I’m sure they’ll love you forever. And you’ll get to taste some of the freshest, most exquisite, diverse and mouth-watering food available to man. Or woman. Or dog. Fo’ serious.

J&W

Summer Berry Jam

Standard

If you are looking for a definitive jam recipe from someone who knows what they are doing this is not it. I sort of made this up as I went along and the recipe that follows is how I may do this in future knowing now what I did right/wrong. I will highlight all the mistakes I made so hopefully you won’t make them too! It still tastes pretty epic by the way but if you want something foolproof…I recommend going elsewhere!

This makes quite a tart jam, so if you have a sweeter tooth obviously up the sugar.

Makes…quite a lot!

Ingredients

1.5 kg summer berries, I used (575g blackberries, 500g raspberries, 500g blackcurrant and 200g blueberries. I realise that doesn’t add up to 1.5 kg but I’m trying to make the weights a bit more scalable)
500g sugar*
6 tbsp orange juice
4 tbsp lemon juice (+keep the lemon, pips** and all)
2 tbsp lime juice (+ keep the lime, pips and all)
handful fresh rosemary
handful fresh thyme
handful fresh lavender
3 tsp vanilla essence
2 tsp ground nutmeg

Method

Squeeze your juices into a deep pan (as deep & wide as you can: jam is like magma when boiling and it has a tendency to jump out and attack you). Get your herbs, put them in a piece of cloth or something porous, with the remains of the lemon and lime (pips and all!) and bind with some twine. Crush with your hands to release the smelly loveliness. This would be a good point to sterilise some jars for preserving, so fill a bowl with soapy water, set the oven to a low heat, wash the jars then stick them in the oven to dry. (Read here for a little more info).

Add 2/3 of all the fruits to the fruit juice over a medium heat and bung in the lovely smelly sack. DON’T ADD ANY EXTRA WATER***. Stir regularly with a spoon and after 10-15 minutes add the sugar, nutmeg and vanilla essence. Continue to bubble away until the fruit is reduced and mushy and somewhere between liquid and solid. Add your remaining fruit – this way you get some mushed-down, jelly-type spread and hopefully some whole fruit too, yippeee – and turn the heat right up for 10 minutes or so. Really my timings are very rough – leave it as long as you deem necessary, the longer you do obviously the stiffer your jam will be.

Please be aware the area around the pan can and will get fairly splattered so don’t wear your favourite-brand-new-turquoise-shorts-that-are-so-good-your-girlfriend-steals-them****.

Remove your jar/s from the oven when dry and immediately fill with the hot jam – a funnel is really useful at this point. Seal the jars as soon as they are full so a vacuum is formed. Leave on the side to cool for a few hours before putting in the fridge, otherwise the glass is liable to crack due to the rapid change in temperature.

Serve on toast, in peanut butter and jam sandwiches (I used to be a non-believer, but my god they are awesome – honestly if you’ve never tried one you really ought to), in puddings, y’know, wherever you usually use jam…!

My Mistakes

*I used 300g of sugar (initially only 200!) and having had it for my lunch to say I have to say it was a little on the…tangy…side, even for me (and I’m usually one for cutting down the sugar in recipes by a lot).

**I didn’t include the pips but apparently they are a big source of pectin which is what is put in jam/jam sugar to help it solidify. So include yours!

***I added 100ml of water – BIG MISTAKE. The berries create plenty of liquid themselves and the extra water just meant it took forever to reduce. Honestly, although it might not seem like it at first you don’t need to add any.

****I got jam splodges on my favourite-brand-new-turquoise-shorts-that-are-so-good-your-girlfriend-steals-them *shock*. Fortunately my dad was there to very kindly wash them while I continued to tend to my jam…in my boxer shorts…

And on that beautiful image I shall leave you! Have a jamtastic time ;]